


There might be scenarios we come across when we are building complex forms where we have a component which is having many template components(child) and each template component has a state and a form in it.
We might face a few issues like
Hard to handle the form state and validation.
Hard to pass data from parent to multiple child components and receive it back.
To handle this kind of problem with forms, Angular provides an interface ControlValueAccessor
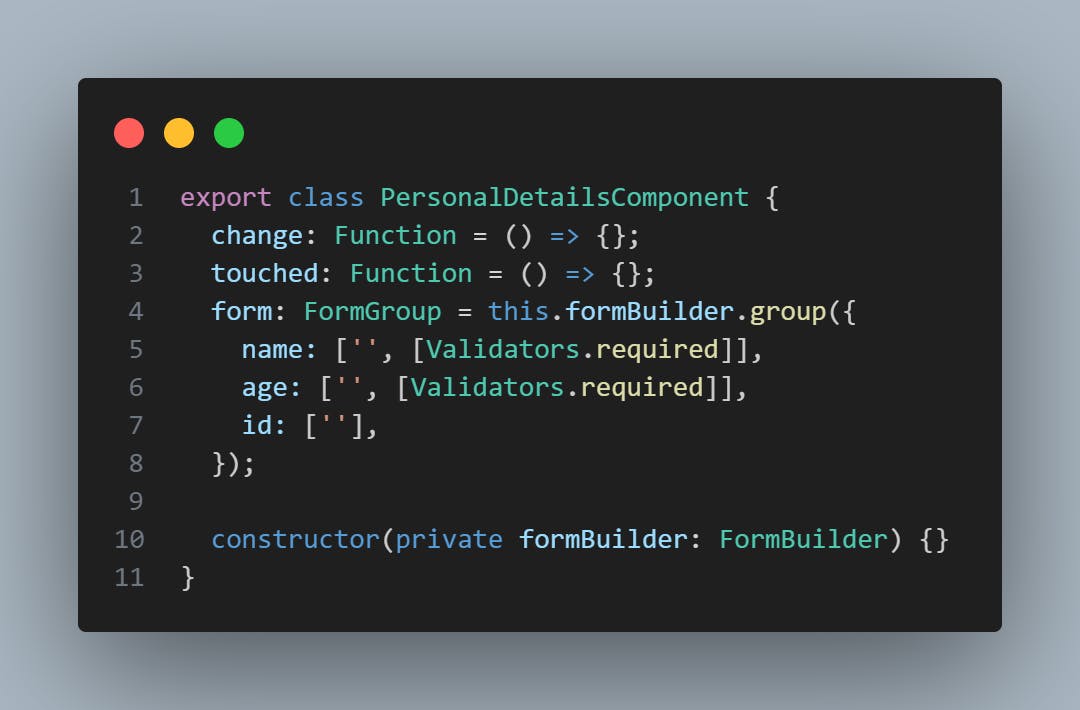
Initially, we created a component called PersonalDetailsComponent which is a form that contains 3 fields name, age and Id. The PersonalDetailsComponent is the child of the parent AppComponent.

Creating a ControlValueAccessor
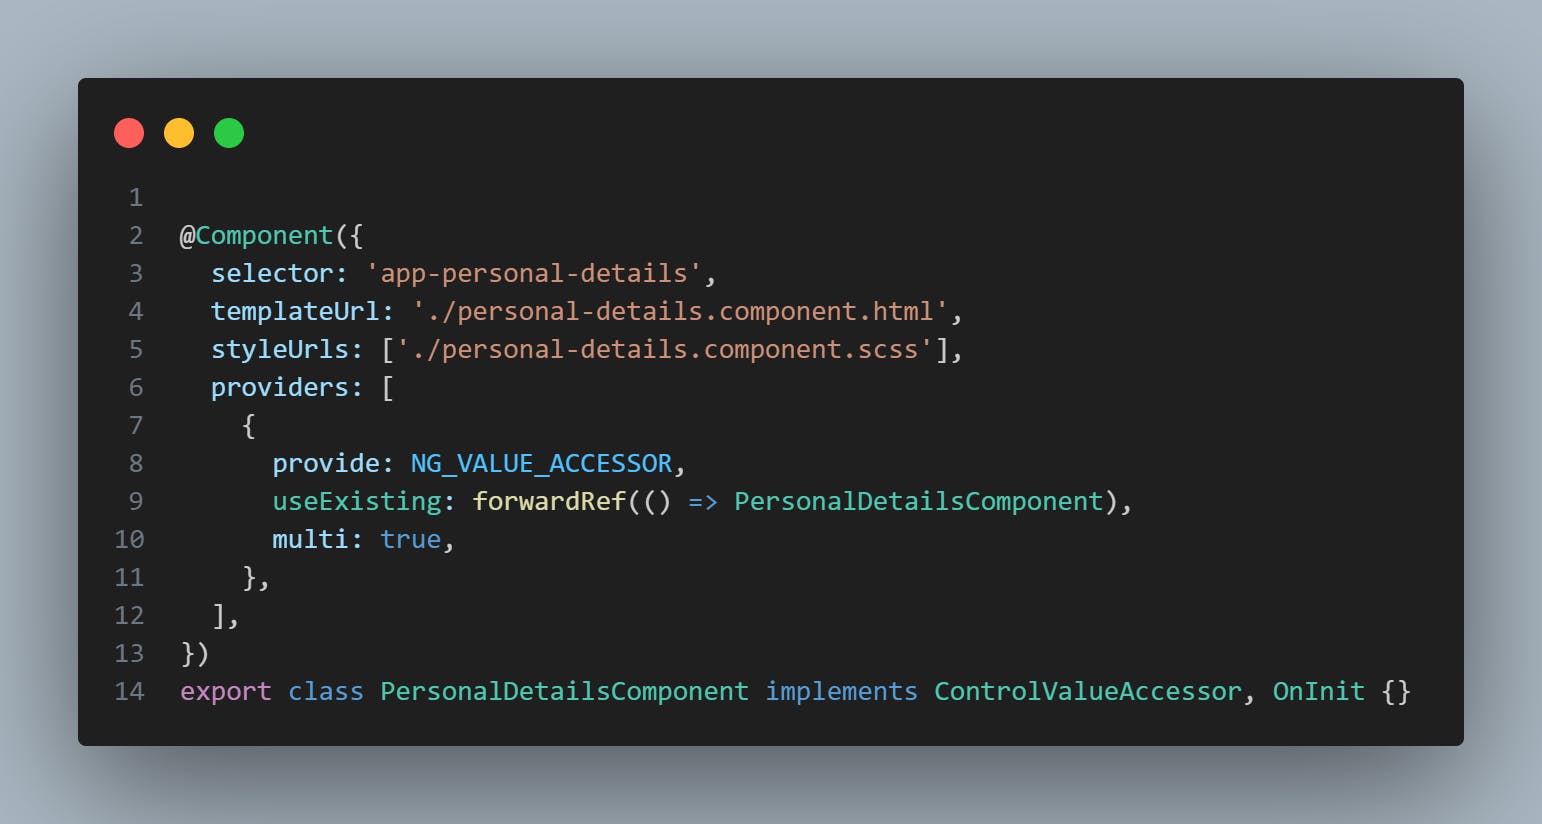
To make a component as a control value accessor in the @Component section of it add a provide NG_VALUE_ACCESSOR and implement the interface ControlValueAccessor on it. I have created the component PersonalDetails which has 3 input fields name, age and Id. The code for NG_VALUE_ACCESSOR looks like below.
Now PersonalDetailsComponent needs to implement 4 functions.
- WriteValue
In this function, we get a parameter which is used to set the data in our child form. The data is received from the parent component. This function is executed when the child component is initially loaded or when the parent sets new data to the child component. In our component we use writeValue() like below.
writeValue(details: { id: string; name: string; age: string }): void {
    this.form.patchValue(details);
}
- registerOnChange
In this function, we get a function as a parameter. registerOnChange() function is called only once during the initial load of the child component and we need to store the reference of the function that is received as a parameter. We call this reference function with the new input value from UI so that it will update the Form control and can pass along the data to the parent. We store the function like below.
registerOnChange(fn: any): void {
    this.change = fn;
  }
We can use the this.change later point like below.
this.form.valueChanges.subscribe((val) => {
      this.change(val);
    });
- registerOnTouch
This is the same as the reginsterOnTouch we get a function as a parameter and we store and call it later point in time. The only difference is that the registerOnTouch() function parameter will be used to keep track if the form that is touched.
registerOnTouched(fn: any): void {
    this.touched = fn;
}
- setDisabledState (optional)
This function is called when the parent tries to disable the form and in this function, we have to customise the fields we can disable or we can disable the whole form.
setDisabledState(isDisabled: boolean): void {
    if (isDisabled) {
      this.form.disable();
    }
}
Adding the child to the parent component
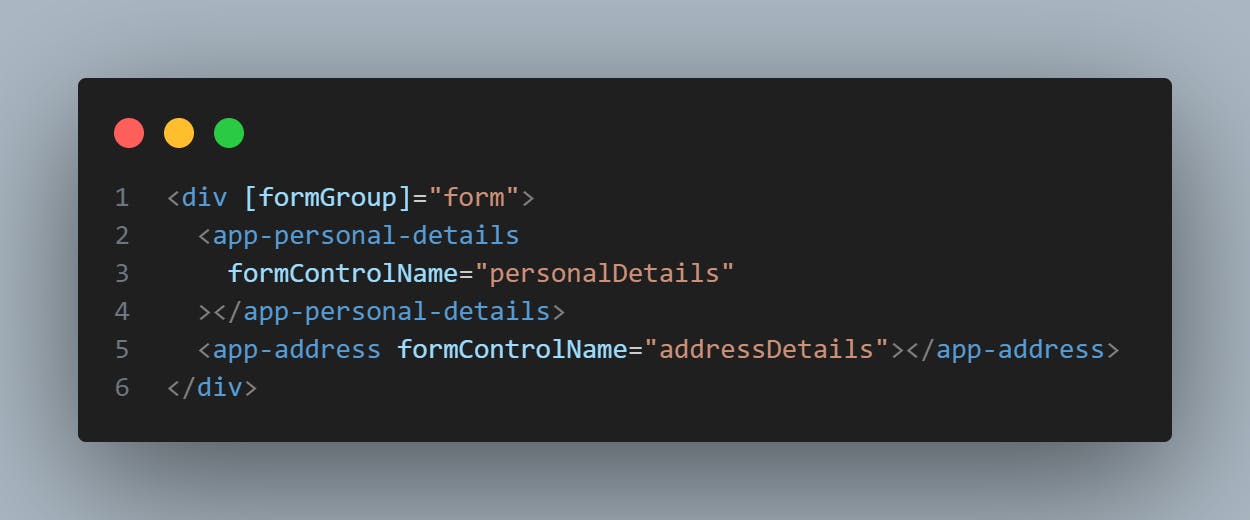
In the main angular project inside the template file of the app.component.html add the personal-details tag and add the formControlName attribute to it. In the app.component.ts create a group and link the individual name child form control to the <personal-details/>.
The code looks like below.

conclusion
Overall we use the Control value accessors to simplify the form interactions across the components and Component to DOM interactions.